Most meat for least mess – Steve Bain’s captioned photo sequence shows how to treat the skinning of a carcass that has the inevitable gun shot wound.
There are many ways to skin a carcass; the step by step sequence in this series of photographs deals with the skinning (only) of a heart/lung shot animal. Such a shot (or shots) on an animal running away from you will normally result in much internal damage and often very little meat is reliably retrievable other than hindquarters and backstraps. The hanging carcass is skinned down to the bullet wound (picture 12); then the carcass is hung in a cool room at least overnight and then the backstraps and hindquarters are removed/processed.
We generally like to leave the skin on while the hog is transported back to camp. Often (hopefully) it is only a short drive in the back of a pickup or buggy. Leaving the skin on keeps the flesh as clean (dirt, grass and twigs free) as can be. The only time that we remove the skin as soon as possible is when we have a clean environment and when we feel that there is a need to remove the maximum amount of heat to get the carcass cooling – such as in hot weather.
Start with a big ‘ol wild sow

#1
A close up of the T-Hangers Gambrel about to be used to lift the sow out of the tray. Each of the gambrel’s hooks will slot into the hole that you have cut between the bone and tendon behind the knee(s).
You can also start by skinning the pelt from the hind legs. Skin the shins all the way back from the knee joint to the ankle; doing this before you get the hind legs up on the gambrel means that you won’t have the later problem of the gambrel getting in the way of the skin removal.

#2
The gambrel slots into the hole/slit cut in between the tendon and the rear of the joint – do this on both hind legs; one each side of the gambrel.

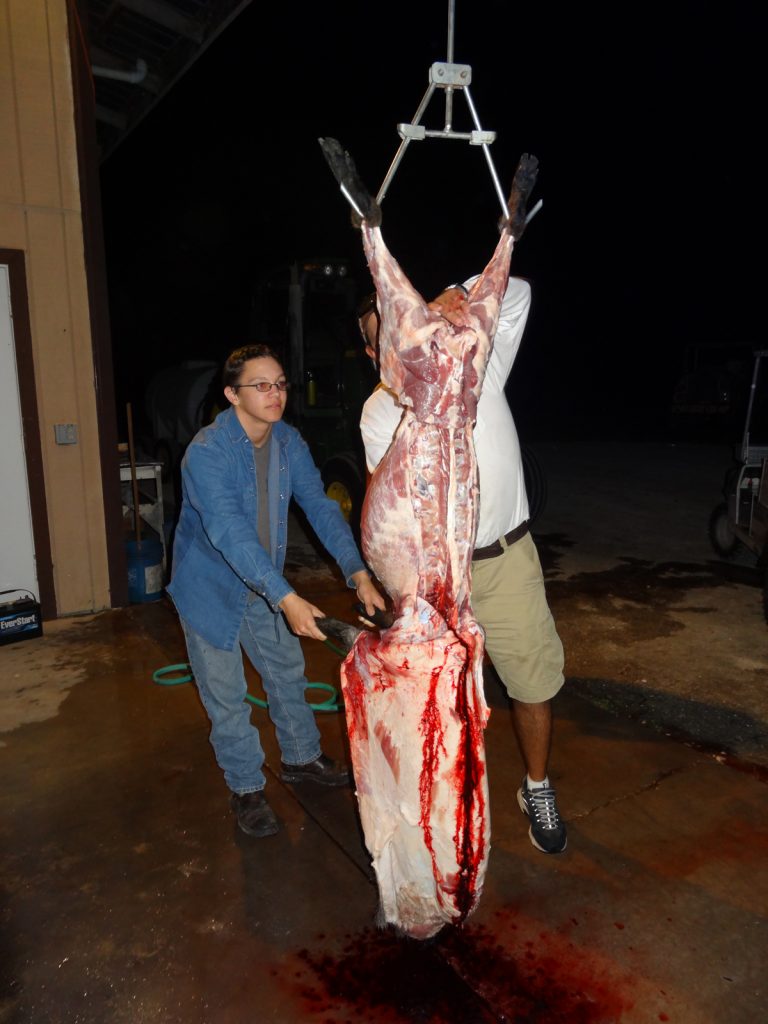
#3
Using a rope and pulleys – raise the carcass completely off the ground.

#4
Because the hocks haven’t been skinned as suggested in step one; cut the skin around the knee joint (on both rear knees)

#5
Next cut a ‘y’ section, do this by using a knife (I like to use the hook of a gut hook knife for these cuts) to open the skin on the inside of each rear leg and after these two cuts are joined up (in the middle of the belly) continue the stem of the ‘Y’ all the way down the middle of the belly and breastbone. Do not puncture the paunch.

#6
Using a skinning blade, start working the skin away from the flesh. Pigs don’t skin as easily as other animals like goats and deer, so you have to use a lot more knife work to separate the tough skin from the pork flesh.

#7
Remove the external female organs (udder) by carefully cutting around them (keeping at least an inch away so that the milk glands are not punctured).

#8
Work the skin away from the flanks on both sides with the aid of your skinning knife – flense the skin off either side and around the full circumference of both hind legs.

#9
Having stripped the skin from each hind leg – you should be able to grab a handful of skin and by dragging downwards it will peel away (by force) from the flesh.

#10
Work the knife around the back to separate the skin from flesh. If you lift the tail away from the sow’s body and work gently with the knife, it will take minimal effort to cut the tail away from the backbone. (Some leave the tail on until later)

#11
At this point you should be able to grab hold of the skin and with a combination of running the knife edge along the join where the skin attaches to the flesh plus dragging downwards with the force of your body weight, the skin will be ripped from the flesh. Keep dragging the skin off and downwards – you may occasionally need to use a curved blade skinning knife to assist.

#12
Skun down to the bullet wound(s). (If required you can tidy up the skin around the hocks once you get the rear legs over to the butchers block)
Wild Pork Backstrap Removal on the Hanging Carcass
Backstraps are one of the best tasting and easiest cuts of meat to butcher from a wild pig.
#13
On a hanging carcass, start the removal of the backstraps by running the knife down one side of the spine from the rump to the neck.

#14
After the muscle has been cut away from the spine; next run the knife in from the side, below the backstrap muscle and across the top of the ribs. You’ll need to hold the backstrap in your hand as it is cut away from the bones.

#15
At the end, cut across the muscle to sever it from the carcass.

#16
The pork loin backstrap from the left has been completely removed from the hog’s frame – the backbone and rib bones that bordered the backstrap can be clearly seen. The backstrap on the right is still in place, however the cut lines are clearly evident; one along the spine and the other across the top if the rib bones – join up the cuts (deepen them) and the backstrap will fall off the frame and into your hands.

#17
Lay the white sinew side of the backstrap down flat on your cutting board and run a sharp knife just above the skin (just like skinning a fish) to remove the ‘silver’ skin from the backstrap.

#18
Once all the sinew/silver is stripped from the backstrap you can then trim the backstrap to length or cut it across the grain into steaks!

