
If you’re a fan of delicious, protein-packed snacks and have a taste for adventure, learning how to make your own deer jerky is a rewarding journey worth embarking upon. Crafting your own jerky allows you to savor the rich flavors of deer meat while enjoying a wholesome and portable snack that’s perfect for hikes, road trips, or simply satisfying your cravings. This article will guide you through the step-by-step process of creating homemade deer jerky, from choosing the right cuts of meat to perfecting the marinade and drying techniques. Whether you’re an experienced jerky maker or a curious beginner, get ready to immerse yourself in the art of transforming lean, flavorful deer meat into a delectable snack that’s bound to impress your taste buds and those of anyone lucky enough to share in the culinary delight.
Choosing The Best Meat For Deer Jerky
Not just any ole hunk of deer meat will make good jerky. Before you waste time trimming and slicing, you need to know which muscle groups are best suited for jerky making.
One of the key factors is the leanness of the cuts. Choosing lean cuts is essential for producing jerky that not only tastes great but also has a longer shelf life. Excess fat can lead to spoilage during the drying process and can negatively impact the texture of the jerky. Therefore, opt for cuts that have minimal visible fat marbling.
Another factor to consider is the location of the cuts within the deer. Muscles from the hindquarters and hind legs are often favored for making jerky. These areas tend to be lean and flavorful, making them well-suited for jerky production.

Tenderness is another crucial aspect when choosing cuts for deer jerky. It’s a good idea to prioritize cuts that are naturally tender. Tenderloin, sirloin, and backstrap (loin) are examples of cuts that are inherently tender and lend themselves well to jerky making. Opting for cuts with a natural tenderness makes the slicing process easier and contributes to a more enjoyable jerky texture.
It’s also advisable to avoid cuts with excessive connective tissues, sinew, and silver skin. These tough components can make the jerky difficult to chew and can detract from the overall quality of the end product.
Cuts commonly chosen for making deer jerky include top round, bottom round, eye of round, sirloin tip, and various hindquarter cuts. These cuts are preferred due to their texture, tenderness, and suitability for the jerky-making process.
However, it’s important to note that certain cuts, such as those from heavily worked muscles like the neck or shank, may be tougher and less ideal for jerky making. These cuts can require more effort to slice thinly and might not result in the desired texture.
Before slicing the meat, it’s crucial to trim any excess fat, connective tissues, and silver skin. This step ensures that your jerky is lean, flavorful, and free from any undesirable elements.
In conclusion, by opting for lean, flavorful cuts from appropriate muscle groups, you’ll set the foundation for a successful jerky-making process that results in a delicious and satisfying snack.
Preparing Meat For Deer Jerky
Half of the work in making good jerky happens before you ever add curing salt or marinade. For starters, you want to make sure that you did a good job field dressing and quartering your wild game. You also want to store it in such a way that it hasn’t gotten freezer burn. Assuming you’ve gotten your deer into the freezer properly, let’s take a second to look at how to thaw it safely.
Properly thawing and handling frozen deer meat is of utmost importance to guarantee both the safety and quality of the meat as you prepare to make jerky. Thawing frozen meat requires careful consideration, with the refrigerator thawing method being the recommended approach. By placing the frozen meat on a plate or in a container in the refrigerator’s lower shelf, you allow it to thaw gradually and avoid the rapid bacterial growth associated with room temperature thawing. Patience is key, as smaller cuts may thaw within a day, while larger cuts might necessitate a couple of days or more.
When handling frozen deer meat, maintaining cleanliness is crucial. Begin by ensuring that your hands, utensils, and work surfaces are clean and sanitized to prevent any potential cross-contamination. If the deer meat is in a package, ensure it’s securely sealed to prevent exposure to air and potential contamination. Should you choose to use butcher paper or alternative wrapping, consider double wrapping to retain the meat’s freshness. Avoid refreezing thawed meat unless it has been cooked, as repeated freezing can impact both texture and flavor.
To guarantee food safety, it’s essential to follow proper guidelines. Keep the thawing meat separate from other foods in the refrigerator to prevent any potential contact. Be mindful of the “Danger Zone” temperature range (40°F to 140°F or 4.4°C to 60°C), during which bacteria can multiply rapidly. Store the meat in the refrigerator or cook it promptly to a safe internal temperature to ensure its safety for consumption.
Once your deer meat is thawed, you can start trimming it. I prefer to trim meat twice, once while I’m processing into basic cuts before I freeze, and a second time after it’s thawed to clean up.
Begin by examining the meat on a clean cutting board. Identify areas with visible fat, tough connective tissues, and silvery membranes. Using a sharp boning or fillet knife, carefully trim away any visible fat, as fat can spoil during the drying process and affect the jerky’s shelf life. Moving on, focus on removing tough connective tissues that might be present as white or translucent streaks. Slide the knife beneath the tissue and gently lift it away from the meat, ensuring the meat remains as lean as possible.
Address the silvery membrane, known as silver skin, which can lead to an undesirable jerky texture. To remove it, gently lift a corner with the knife and peel it off, keeping the knife close to the meat to minimize waste. After each trimming, inspect the meat to ensure that all undesired elements have been effectively removed, and repeat the process if necessary.
Dispose of the trimmed fat, connective tissues, and silver skin properly. This could involve discarding them in a trash bag or repurposing them for making broth or stock. To maintain hygiene, clean and sanitize your cutting board, knife, and work area once the trimming is complete.
Once your venison is thawed and trimmed, you’re ready to slice it. To achieve thin and uniform slices of venison for making jerky, follow these step-by-step instructions.
Start by partially freezing the venison for about 1 to 2 hours, as this makes the meat firmer and easier to slice. Prepare your workspace by sanitizing the cutting board and placing a damp cloth or paper towels underneath to prevent slipping.
When ready to slice, identify the direction of the grain in the meat. Slicing against the grain is important for creating tender jerky. Begin by cutting a small section of the partially frozen venison to create a stable flat surface. Hold the meat with your non-dominant hand and use a sharp boning or fillet knife held perpendicular to the grain to slice thin strips. Aim for slices about 1/8 to 1/4 inch thick to ensure even drying.
Keep your fingers away from the blade and use a sawing motion to cut through the meat. Let the knife do the work to avoid smushing the meat fibers. Maintain control over the knife and work with one small section of meat at a time. Adjust the slicing angle as needed to achieve the desired thickness, which may vary based on the meat’s texture.
As you progress, periodically wipe the knife blade with a damp cloth or paper towel to keep it clean. Trim irregular pieces at the edges and save them for other recipes. Place the sliced venison strips on a plate or tray, ensuring they are separated to prevent sticking during drying. If you’re not marinating the slices immediately, store them in a resealable plastic bag or airtight container in the refrigerator.
Choosing The Best Deer Jerky And Seasonings
Marinating plays a pivotal role in enhancing both the flavor and tenderness of deer jerky, transforming it from plain meat into a delectable and satisfying snack. Marination involves soaking the meat in a flavorful liquid mixture, allowing it to absorb the seasonings, spices, and aromatics. Here’s why marinating is so important when making deer jerky.
First, marinating infuses the meat with a burst of flavors that develop as the meat absorbs the marinade’s ingredients. The combination of ingredients such as soy sauce, Worcestershire sauce, vinegar, oil, herbs, and spices contributes to a complex and well-rounded flavor profile. As the meat marinates, it takes on the savory, sweet, tangy, and aromatic notes of the marinade, enhancing its taste and making each bite an explosion of deliciousness.
Can’t you just season the meat? Well, you could. But marinating, as opposed to sprinkling on dry seasonings, ensures that the flavors are evenly distributed throughout the meat. The liquid mixture penetrates the meat’s fibers, ensuring that every slice carries the same delectable taste. This uniform distribution guarantees that no bite is bland or overpowering, offering a consistent and enjoyable jerky experience.
Aside from adding flavor, marinating contributes to the tenderness of the jerky. Many marinade ingredients contain enzymes, acids, and salts that help break down tough muscle fibers, making the meat more tender. This is particularly beneficial when working with lean cuts of deer meat that might otherwise be chewy. The marinade’s acidity can act as a natural tenderizer, resulting in a jerky that’s easier to chew and enjoy.
You can buy a premade marinade like the many different varieties from Hi Mountain Seasonings but it’s fun to experiment with your own. Crafting a balanced and flavorful marinade for deer jerky involves several key tips to ensure a delightful outcome.
First, strive for a harmonious equilibrium of flavors by incorporating elements of sweetness, saltiness, acidity, and umami. These components work together to create a well-rounded taste experience. To achieve tenderness and flavor enhancement, opt for acidic ingredients such as vinegar, citrus juices, or wine, as their natural tenderizing properties break down tough muscle fibers in the meat.
Including salty components like soy sauce or Worcestershire sauce contributes depth to the marinade and aids in preserving the jerky. To counterbalance the acidity and saltiness, introduce a touch of sweetness with ingredients like brown sugar, honey, or fruit juices. Elevate the complexity of the marinade by layering flavors with a diverse array of spices and herbs such as garlic, black pepper, cayenne pepper, smoked paprika, thyme, and rosemary.
Umami, known for its savory richness, can be enhanced using ingredients like soy sauce, Worcestershire sauce, or fish sauce. Maintaining consistency in mixing the marinade ensures uniform flavors throughout the jerky. Begin with a basic ratio of acidic, salty, sweet, and savory elements, and feel free to adjust the proportions according to your taste preferences. Allowing the meat to marinate for an extended period, preferably several hours to overnight, deepens the infusion of flavors and contributes to enhanced tenderness.
Before adding the meat to the marinade, consider taste testing the mixture to fine-tune the balance of flavors. It’s worth noting that while experimentation is encouraged, sometimes a simple yet well-chosen combination of ingredients can yield outstanding results. As you become more comfortable, you can customize the marinade to your liking, taking note of ingredient quantities and ratios for future reference.
How To Marinate Meat For Deer Jerky
Place the thinly sliced deer meat in a mixing bowl or resealable plastic bag, ensuring it has enough space for the marinade to coat it evenly. Pour the prepared marinade over the meat, gently tossing it to ensure all slices are coated. Seal the container with plastic wrap, a lid, or by pressing out excess air from the bag and sealing it tightly. Refrigerate the container, allowing the meat to marinate for several hours to overnight, permitting the flavors to penetrate and tenderize the meat.
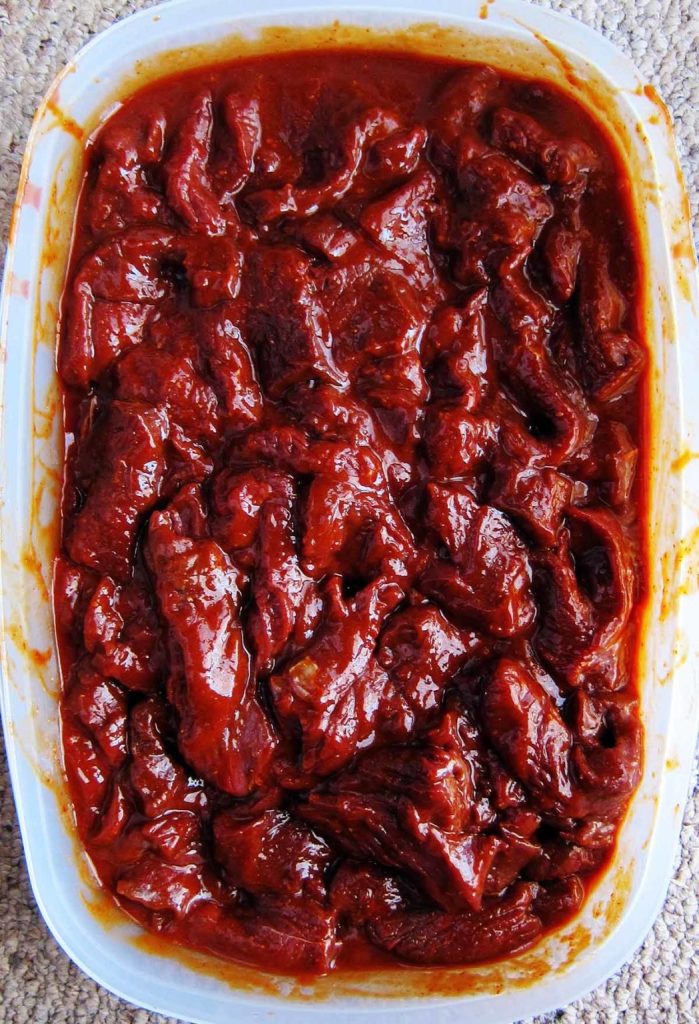
During the marinating period, it’s beneficial to mix or toss the meat a few times to ensure an even distribution of flavors. Once the desired marinating time has elapsed, remove the meat from the marinade. Before proceeding to the jerky-making process, pat the marinated slices dry with paper towels to remove excess moisture. This prepares the meat for drying in an oven, dehydrator, or smoker, where it transforms into delectable jerky.
How Long Should You Marinate Meat For Jerky?
The ideal marinating time for deer jerky depends on factors such as the meat’s thickness, your desired flavor intensity, and safety considerations. Given that jerky meat is thinly sliced, it absorbs flavors relatively quickly, suggesting that marinating times can be shorter compared to thicker cuts of meat. Deer meat’s lean nature contributes to efficient flavor absorption, making moderate marinating times effective.
When considering marination duration, your flavor preferences come into play. Opting for a shorter marination period of around 2 to 4 hours will yield milder flavor enhancement, which can be suitable when time is limited. A marination span of 4 to 6 hours strikes a balance between flavor development and tenderness enhancement, making it a common choice for many jerky recipes. For a stronger flavor profile and more tender texture, extending the marination to 8 to 24 hours, preferably overnight, is recommended. However, exceeding 24 hours—especially with marinades containing acidic components—should be avoided, as prolonged marination can potentially affect the meat’s texture.
While these guidelines offer a starting point, individual preferences play a vital role in determining the marinating time that aligns best with your desired outcome. If you’re following a trusted jerky recipe, adhering to the recommended marinating time in the recipe ensures optimal results.
Deer Jerky Drying Methods
Most hunters dry their jerky using either an oven or a food dehydrator. If this is your first time making jerky, just know that there’s no reason to rush out and buy a dehydrator. But, they do make the process easier and generally allow you to process bigger batches.
If you’re using an oven, start by preheating your oven to a low temperature, typically around 150°F (65°C) or the lowest setting available. This gentle heat helps gradually dry the jerky without cooking it. Set up your workspace by placing wire racks or oven-safe cooling racks on baking sheets. If desired, you can line the baking sheets with aluminum foil for easier cleanup.
Arrange the marinated deer jerky slices on the racks, ensuring they’re not overlapping to allow proper air circulation. To enhance drying efficiency, prop open the oven door slightly using a wooden spoon or oven-safe utensil. This allows moisture to escape and promotes air circulation.
If you have an oven thermometer, it’s recommended to place it on one of the racks inside the oven to monitor and maintain a consistent low temperature. As the jerky dries, rotate the baking sheets and flip the slices halfway through the process to ensure even drying.
The drying time varies based on factors like the thickness of the slices and your oven’s capabilities. Generally, the process can take anywhere from 2 to 6 hours. The jerky is ready when it’s firm to the touch, bends without snapping, and has a leathery texture. Thicker slices may require additional drying time.
If you’re using a dehydrator, the process is essentially the same.To begin, ensure your food dehydrator is clean and ready for use. If the dehydrator’s trays are removable, applying a light coat of non-stick cooking spray can prevent the jerky from sticking during drying. Lay the marinated deer jerky slices onto the trays, making sure they have enough space between them to allow for proper air circulation, a key factor in achieving even drying.
Set the temperature on your food dehydrator to the recommended range, typically around 145°F to 165°F (63°C to 74°C). If you prefer precision, placing an oven thermometer on one of the trays will help you monitor the temperature as the jerky dries. Once you’ve adjusted the settings, start the dehydrator and set the timer based on the estimated drying time. Keep in mind that drying time can vary depending on factors such as slice thickness and the dehydrator’s efficiency.
As the jerky dries, periodically inspect its progress. Thinner slices might be ready in 4 to 6 hours, while thicker ones could require up to 12 hours or more. A simple test to determine doneness is checking if the jerky is firm to the touch, bends without snapping, and boasts a leathery texture.
If your dehydrator features multiple trays, consider rotating them during the process to ensure consistent drying. Once the jerky reaches your desired texture, turn off the dehydrator and allow the jerky to cool on the trays. Cooling further firms up the jerky’s texture.
How Do I Know When Deer Jerky Is Done Drying?
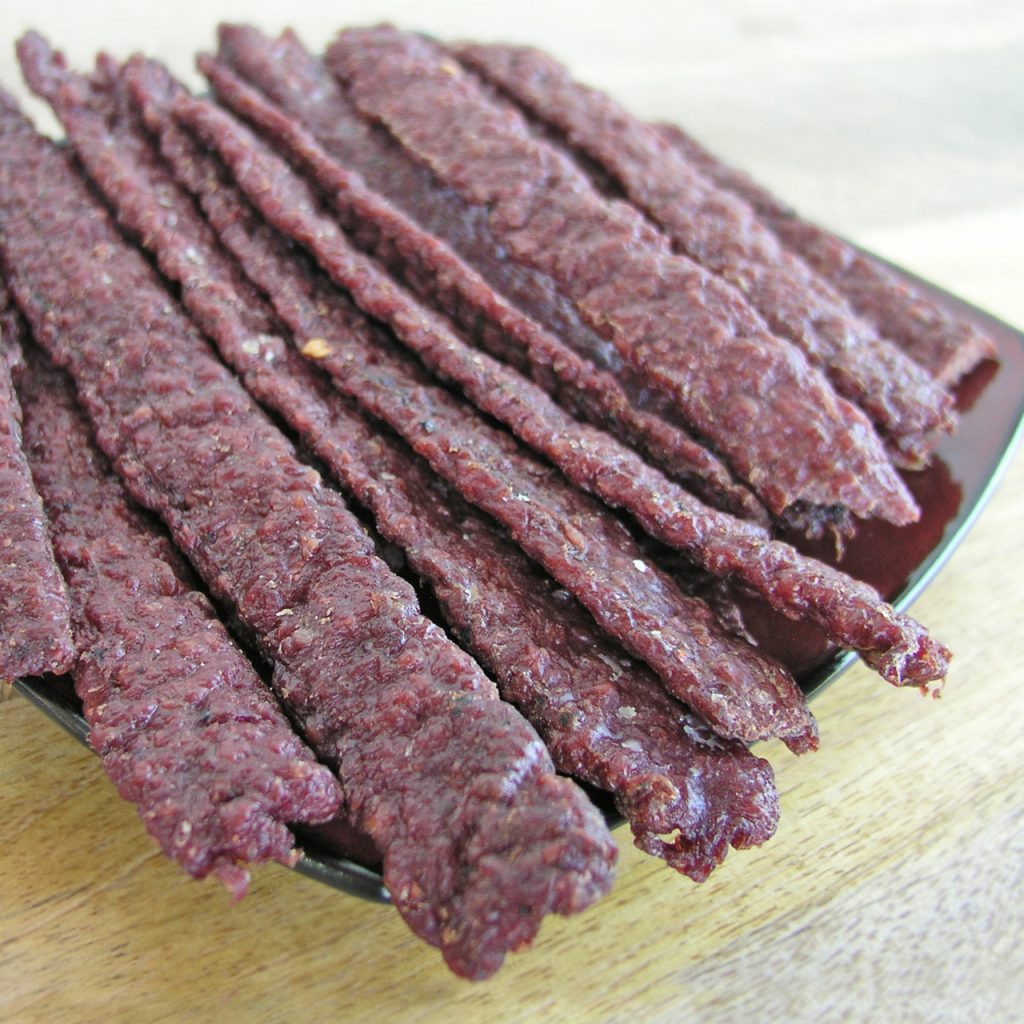
Recognizing when deer jerky has completed drying involves several key indicators that assure both safety and desirable texture. One method involves conducting a “texture test” by gently touching a piece of jerky; it should exhibit firmness and a leathery texture. When you bend the jerky, it should flex without breaking or snapping. If the texture appears rubbery or overly pliable, it suggests that more drying time is needed.
A visual inspection is equally important; well-dried jerky should possess a consistent color without any visible areas of moisture or dampness. Any sections that appear darker or moister require additional drying. The “bite test” is another method—take a small piece of jerky and chew it. It should offer a satisfying chew without being too tough or overly dry. Excessively dry or difficult-to-chew jerky indicates possible over-drying.
Allowing a piece of jerky to cool completely after removal from the dehydrator or oven can sometimes reveal an optimal texture and flavor. An optional test, the “snap test,” involves bending the jerky to listen for a snapping sound similar to breaking a dry twig. While not always accurate for all jerky types, it can provide a helpful cue. Keep in mind that drying times vary based on slice thickness, drying method, and humidity levels. Slightly under-drying is preferable to over-drying, as the latter can lead to overly tough and dry jerky.
Through experience, you’ll develop a better sense of the nuanced cues that signify perfectly dried deer jerky. By attentively observing texture, appearance, and flavor, you’ll achieve the desired balance between tenderness and dryness for your homemade deer jerky.
Best Way To Store Deer Jerky
Properly storing deer jerky is essential to preserving its quality and taste. After the jerky has cooled completely following the drying process, make sure to eliminate any remaining moisture by patting the slices with paper towels. To maintain freshness, store the jerky in airtight containers or resealable plastic bags, removing as much air as possible before sealing. Vacuum-sealing is a highly effective option that minimizes exposure to air and moisture. For portion control and convenience, consider dividing the jerky into smaller serving sizes before sealing.
To keep the jerky at its best, store the containers in a cool, dark, and dry place—direct sunlight and temperature fluctuations can affect the flavor and texture. While jerky is shelf-stable, refrigeration can extend its shelf life, particularly for longer storage periods. If you choose to refrigerate the jerky, use moisture-absorbing packets or desiccants to prevent excess moisture.
For long-term storage, freezing is a viable choice. Divide the jerky into individual portions and place them in vacuum-sealed packets or resealable bags to prevent freezer burn. When thawing frozen jerky, do so in the refrigerator to ensure it retains its texture and flavor.
Regularly inspect the stored jerky for signs of moisture, mold, or off-odors. Should any of these issues arise, remove the affected pieces to prevent contamination. Following these guidelines ensures that your homemade deer jerky maintains its deliciousness and remains a flavorful snack over an extended period.
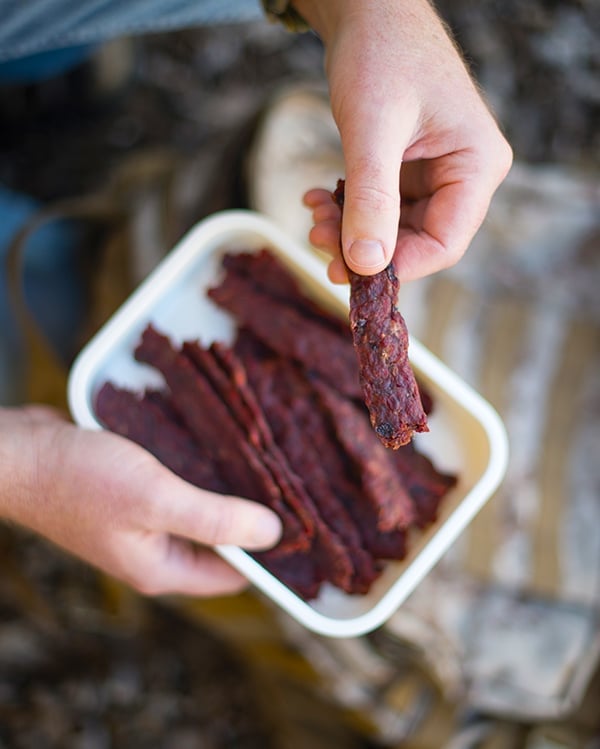
Enjoying Your Homemade Deer Jerky
Homemade deer jerky can be enjoyed in many ways. As an on-the-go snack, it’s convenient to pack in resealable bags or containers, making it perfect for busy days. Elevate your snacking game by incorporating chopped jerky into your trail mix, adding a protein-packed punch to the blend of nuts, dried fruits, and seeds. For a tasteful twist, arrange slices of your homemade deer jerky on a charcuterie board, accompanied by cheeses, crackers, and olives, creating a delightful spread for gatherings or cozy evenings.
Thinking outside the box, transform your culinary creations by crumbling or finely chopping jerky to use as a flavorful topping for pasta, soups, chili, or salads. You can also experiment with incorporating jerky into dishes such as omelets, quiches, and baked goods.
Final Thoughts On Deer Jerky
In conclusion, creating your own deer jerky is a fun and satisfying adventure that brings many benefits. When you make jerky at home, you’re in charge of what goes into it, and you can make it taste just the way you like. This article has given you all the information you need to pick the right meat, marinate it well, dry it properly, and store it correctly. By making your own jerky, you’re not only enjoying a tasty snack, but you’re also joining a long tradition of people who’ve been making jerky for a long time. So, get ready to have fun, try different flavors, and enjoy the pride of making your very own delicious deer jerky.
