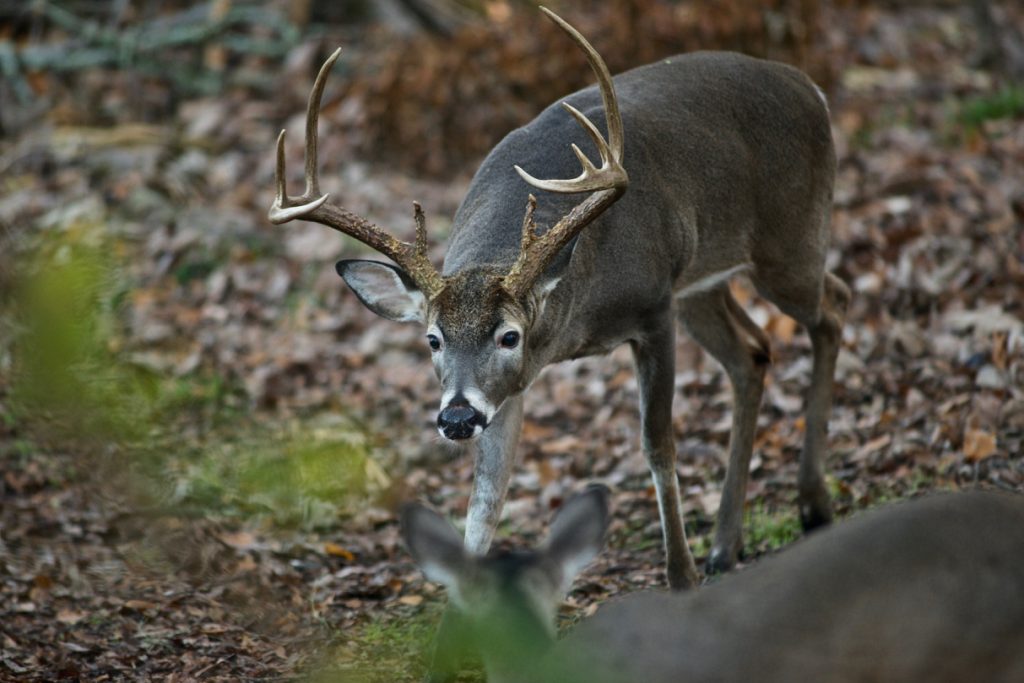
If you’re reading this, congratulations! You managed to successfully scout your property, pick a stand location, access it undetected, make the shot, and follow the blood trail to your deer. You’ve probably already taken a few pictures (if not, pro tip: be sure to clean both your camera lens and any blood around the deer’s mouth, and get that camera low to the ground) and sent word to your buddies. Hopefully the “attaboy” replies are trickling in already.
Feels good, doesn’t it?
But as the adrenaline starts to wear off and your brain starts firing again, a new problem pops up. What the heck are you going to do with this thing now?
Converting a carcass to food can be a daunting task. How you handle the animal for the next several hours will have a big impact on the quality of your backstrap steaks and deer chili. Luckily, we’re here to help.
The first thing you need to do is field dress that deer. Field dressing refers to opening the chest and abdominal cavities and removing the internal organs. Your deer, even if it’s still warm and clear-eyed, is starting to rot. And the first thing to go is the internal organs. You want to get all of that stuff out of the animal’s body and away from that delicious red meat in a timely and clean manner. Doing so minimizes the risk of bacterial contamination.
It also helps to cool the carcass, further preventing spoilage. And, if you’ve got a long way to drag, it’s going to make your burden substantially lighter. So let’s jump into how to field dress a deer.
How To Field Dress A Deer
Unzip Your Buck
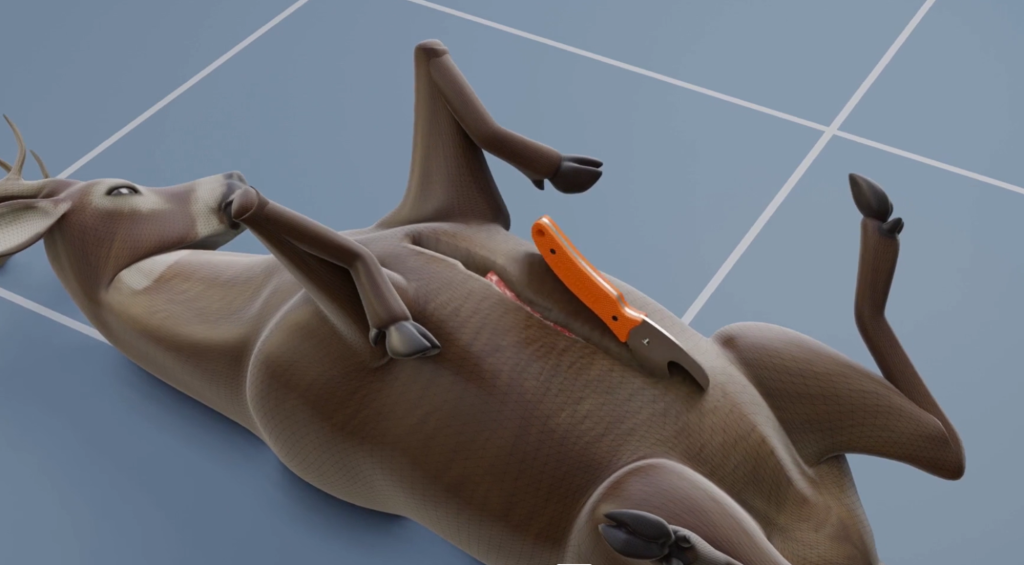
Starting where the base of the neck fades into the chest, cut over the top of the sternum, following it down to where it ends at the top of the belly. At this point, cut slightly deeper and into the thin muscle wall of the abdominal cavity. Be careful not to cut into any internal organs. A gut hook knife or some other specialty tool that limits how deeply you can cut can be useful for this step.
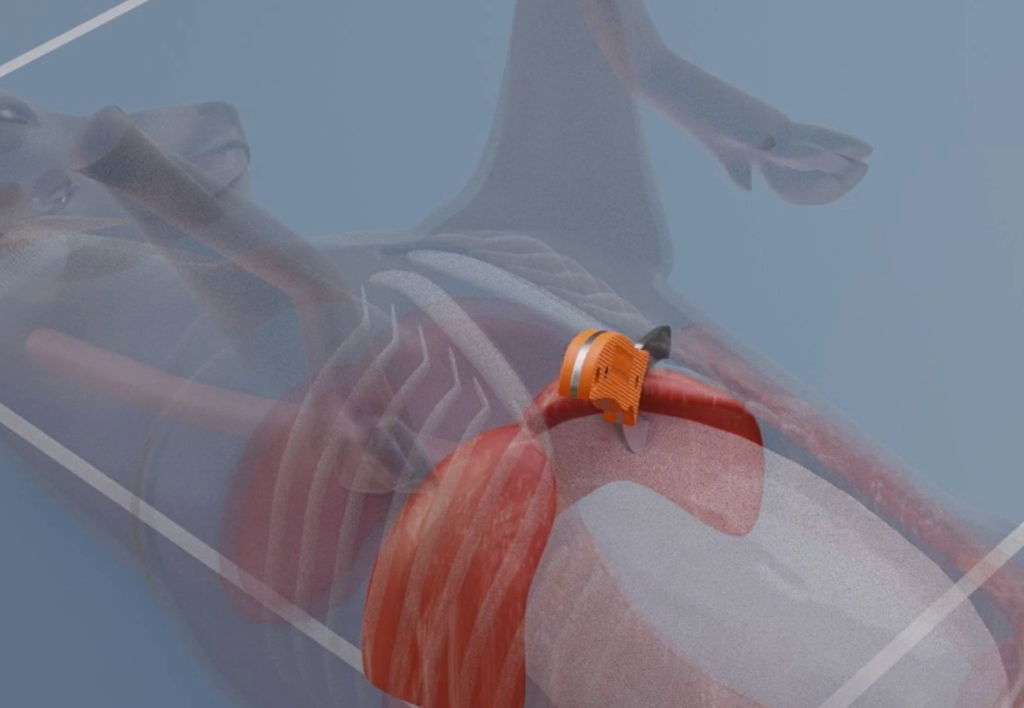
Cut Through The Pelvis

Using a saw, a heavy-duty pair of shears, a stout knife, or a specialty knife such as the FieldTorq tool, cut through the animal’s pelvis. It is very important not to puncture the animal bladder during this step. If you do puncture the bladder, immediately rinse the contaminated area with water.
Open The Chest Cavity
Again, using a tool designed to cut through heavy bone, go back up to the animal’s chest and cut through the animal’s rib cage. You can be a little rougher during this operation, since nothing in the creature’s diaphragm will contaminate the meat. The important thing is to not cut yourself! Many accidents have occurred at this stage due to hunters trying to force a knife blade through the tough sternum from the inside out. If you do this, you risk stabbing yourself when the blade finally cuts through the bone!
Cut The Diaphragm
Cut through the animal’s diaphragm where it connects to the ribcage, once again being careful not to puncture any internal organs. The diaphragm is a very thin layer of muscle that works to inflate and deflate an animal’s lungs. It also serves as a barrier between the upper chest cavity and the lower abdominal cavity. It will look like a barrier of tissue separating the lungs from the rest of the organs. This will need to be removed before we can start removing the internal organs from the animal’s body cavity.
Cut The Windpipe

Carefully grab and cut the deer’s esophagus. Be very careful not to inadvertently cut your fingers when doing this.
Pull Everything Out
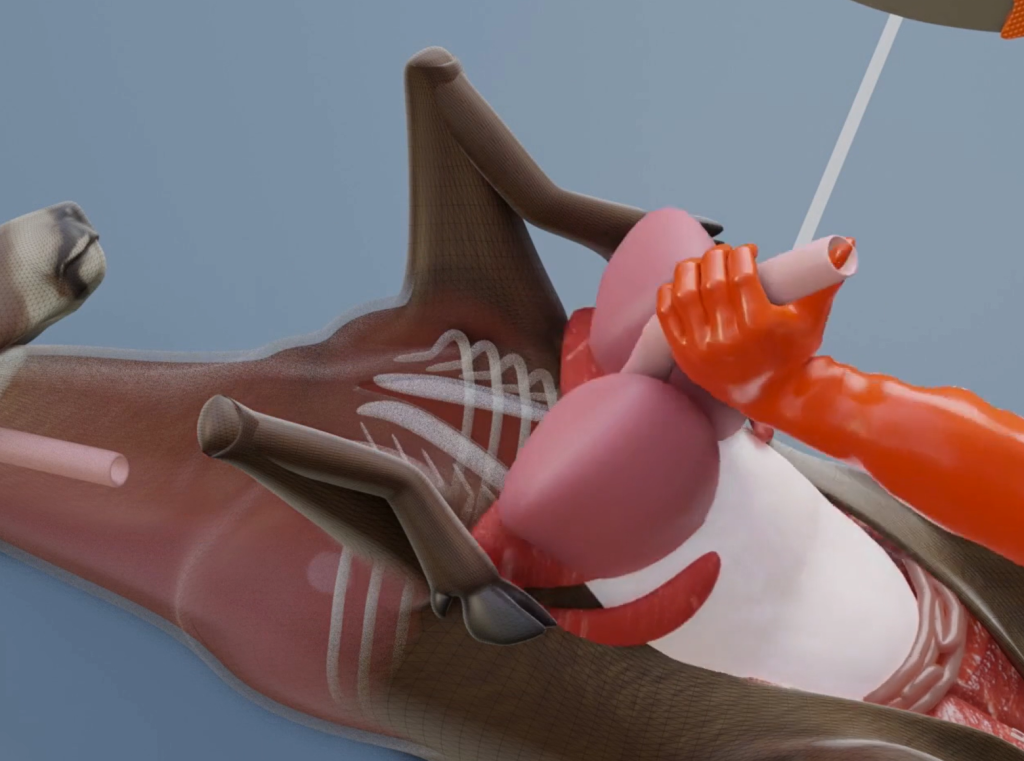
Now that you’ve severed the internal organs from everything attaching them to the rest of the carcasse, it’s time to remove them. Grab the esophagus firmly, and pull hard backwards towards the rear of the animal. If you did a good job cutting around the diaphragm, everything should come out smoothly.
Note that if you haven’t already done so, now is a great time to harvest edible organs such as the heart, liver, and kidneys. If you’re turning your nose up at the thought of eating “offal,” give it a try! You’ll never eat a more tender or flavourful cut of meat than a properly prepared deer heart, and liver and onions is one of my personal favorite post-hunt victory meals. Unlike with a lot of store-bought meat, wild animals aren’t fed a steady diet of antibiotics and injected with growth hormones that are filtered by the liver and kidneys, so you can eat them with peace-of-mind.
Once you’ve removed the organs and separated the edible ones (I like to keep a quart freezer bag for the heart and a gallon-sized one for the liver) you’re mostly done. Depending on how clean you worked or how your shot placement was, you may or may not want to give the inside of the body cavity a quick rinse with some clean water. Some hunters like to zip-tie the body cavity back closed to prevent dirt and leaves from entering it on the drag out. Others in snowy climates will pack the cavity full of snow to further facilitate cooling.
Once you’ve finished tying up loose ends and making arrangements for the drag out, take a minute, straighten up, stretch your back, and congratulate yourself. You’ve successfully field dressed your deer!
How To Field Dress A Deer FAQs
What do you need to field dress a deer?
You don’t need a lot of gear to field dress a deer, but having a few specialized tools on hand will make the process easier, safer, and cleaner. Arm-length rubber or PVC gloves will keep you clean while you work. A small pack of wet wipes will help you to clean up any mess that you make. Obviously, a sharp knife is essential, but you may also want to consider having a specialized tool to help you cut through the pelvic bone and sternum. Several cutlery companies make saws or shears for this purpose, but they can be tricky to use without puncturing internal organs. The FieldTorq tool can be used for every step in the field dressing process, and it is almost impossible to puncture organs or injure yourself with.

What are the best knives to field dress a deer with?
Sharp ones! A dull knife is incredibly frustrating to use and can be downright dangerous to the user. You also want a knife that can be easily cleaned after use so that you don’t risk contaminating the next kill you process.
What you definitely don’t want is a huge, “survival knife.” A 3-4 inch blade is more than enough to field dress a deer with. Too big of a blade and you’ll have difficulty maneuvering it within the confines of the rib cage.
Do you have to field dress a deer?
Not necessarily. If the weather is cold and you are going to be immediately quartering and processing the deer, you don’t have to field dress it. But field dressing offers several benefits. Removing internal organs makes the carcasse easier to drag out of the woods and helps meat to cool faster, preventing spoilage. Leaving the organs in the woods means that you don’t have to take them back to camp only to then need to get rid of them before they start to stink.
An option that is gaining popularity with some hunters is the “gutless method” of field dressing a deer. The process basically involves removing the animal’s leg quarters, backstraps, and neck cuts, and then removing the rib meat in a single “rib roll.” This method requires a bit more finesse, and care must be taken not to get dirt and hair on the meat, but the end result means that you leave hair and bone in the field along with the guts. Where legal, it’s an awesome alternative to traditional field dressing.
How soon should you field dress a deer?
The sooner, the better. The bacteria colonies in deer start to change immediately after death. As time goes on, this change leads to the earliest stages of decomposition and will eventually render your hard-won meat inedible.

How long does it take to field dress a deer?
That depends very much on how skilled the hunter is. If this is your first time, don’t feel bad if it takes half an hour to field dress a deer. You’ll get quicker every time you do it. An experienced hunter can usually field dress a deer in less time than it will take you to read this article.
The important thing to remember is it’s not about the time it takes, it’s about how clean and how safely you work. Getting in a hurry or getting frustrated is a good way to cut something that you don’t want to cut, possibly yourself!
How much does a deer weigh after field dressing?
A deer will typically shed 20-30% of its live weight once it is gutted. Bigger, more muscular deer will lose proportionately less weight, and a smaller doe will have comparatively more of its total weight in its guts.
Final Thoughts On How To Field Dress A Deer
It’s important to remember as you work that field dressing a deer cleanly and safely requires patience and focus. The goal is to do a good, clean job to ensure the highest quality meat for you and your family. The key to success is to have the proper tools on hand before you start, take your time, and pay attention to what you are doing. If you do that, you’ll be rewarded with a safe and pleasant experience and higher quality meat at the dinner table.
